Workstation Ergonomics: How to Set Up a Healthy Desk


By now, you know that poor office posture can lead to repetitive stress injuries and overall health issues. But you might still be wondering how exactly to correct the problem. Here, you’ll find a handy guide to help you adjust your way to workplace health.

Bends

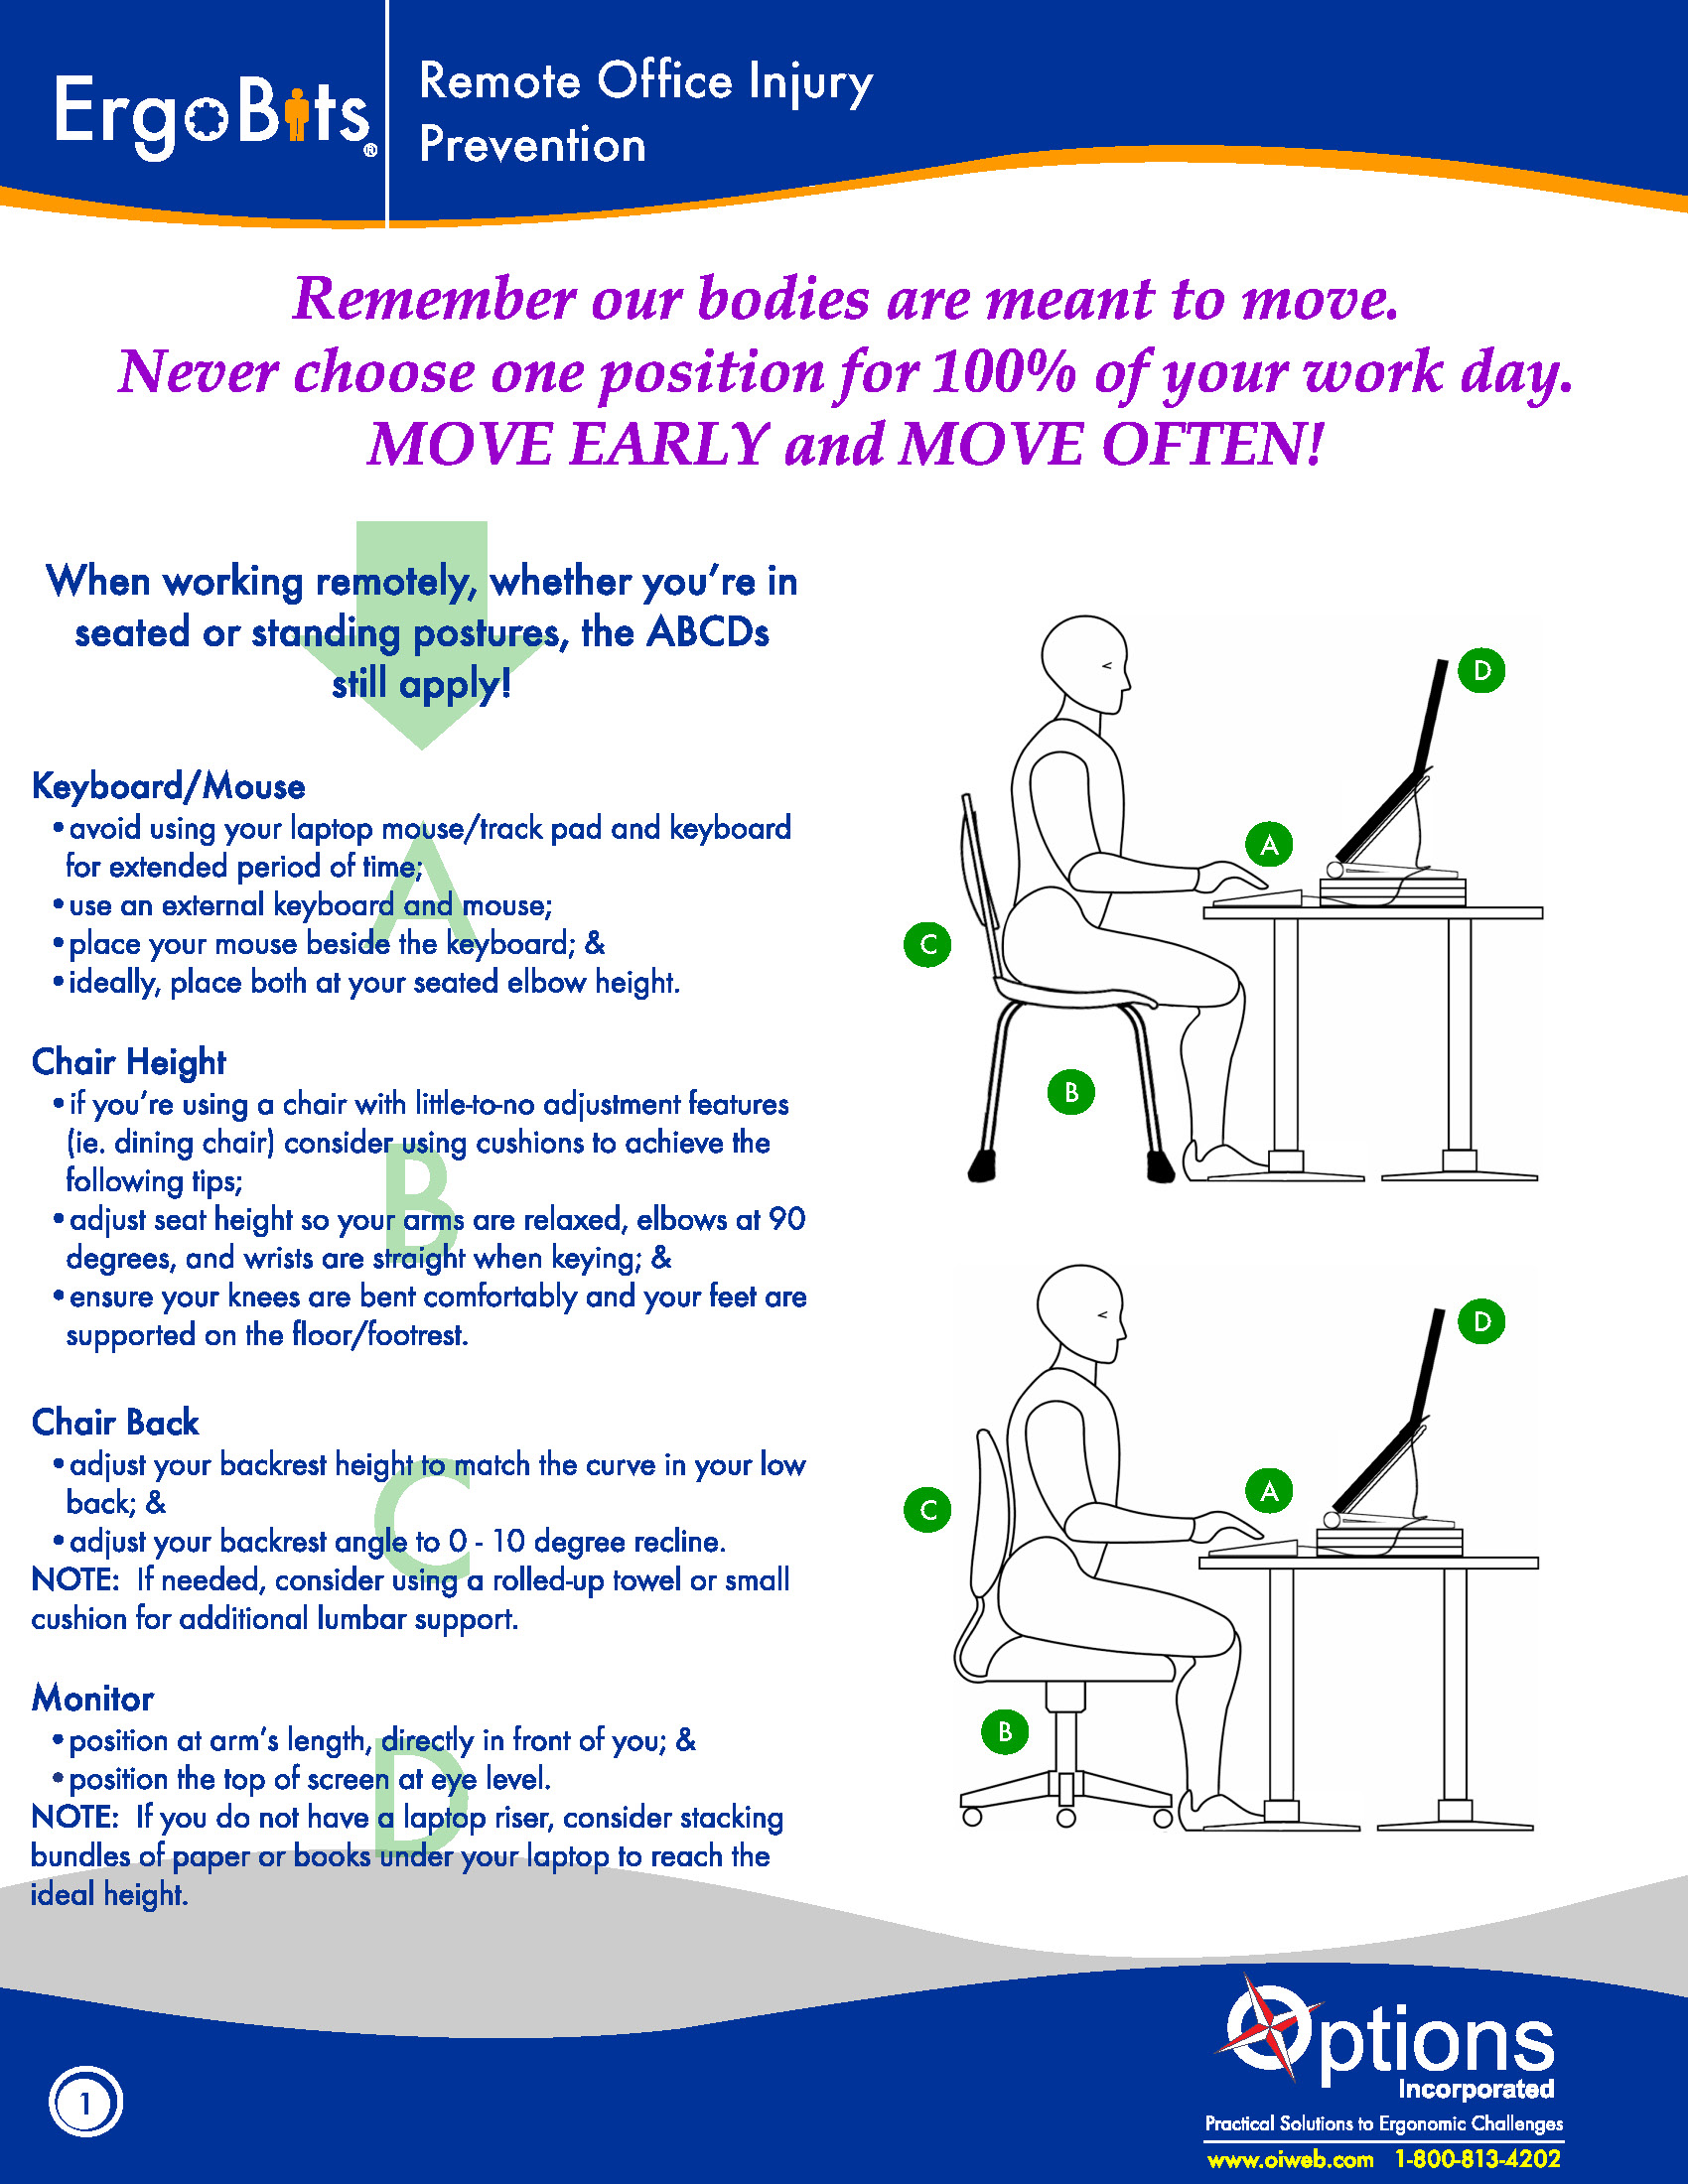
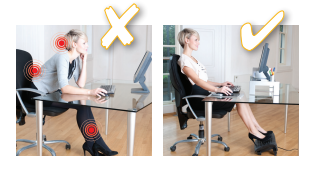
When adjusting your monitor, chair and desk, the right angle in your best friend. For example, your knees should be bent at ninety degrees, with your thighs resting comfortably and your feet planted on the floor.

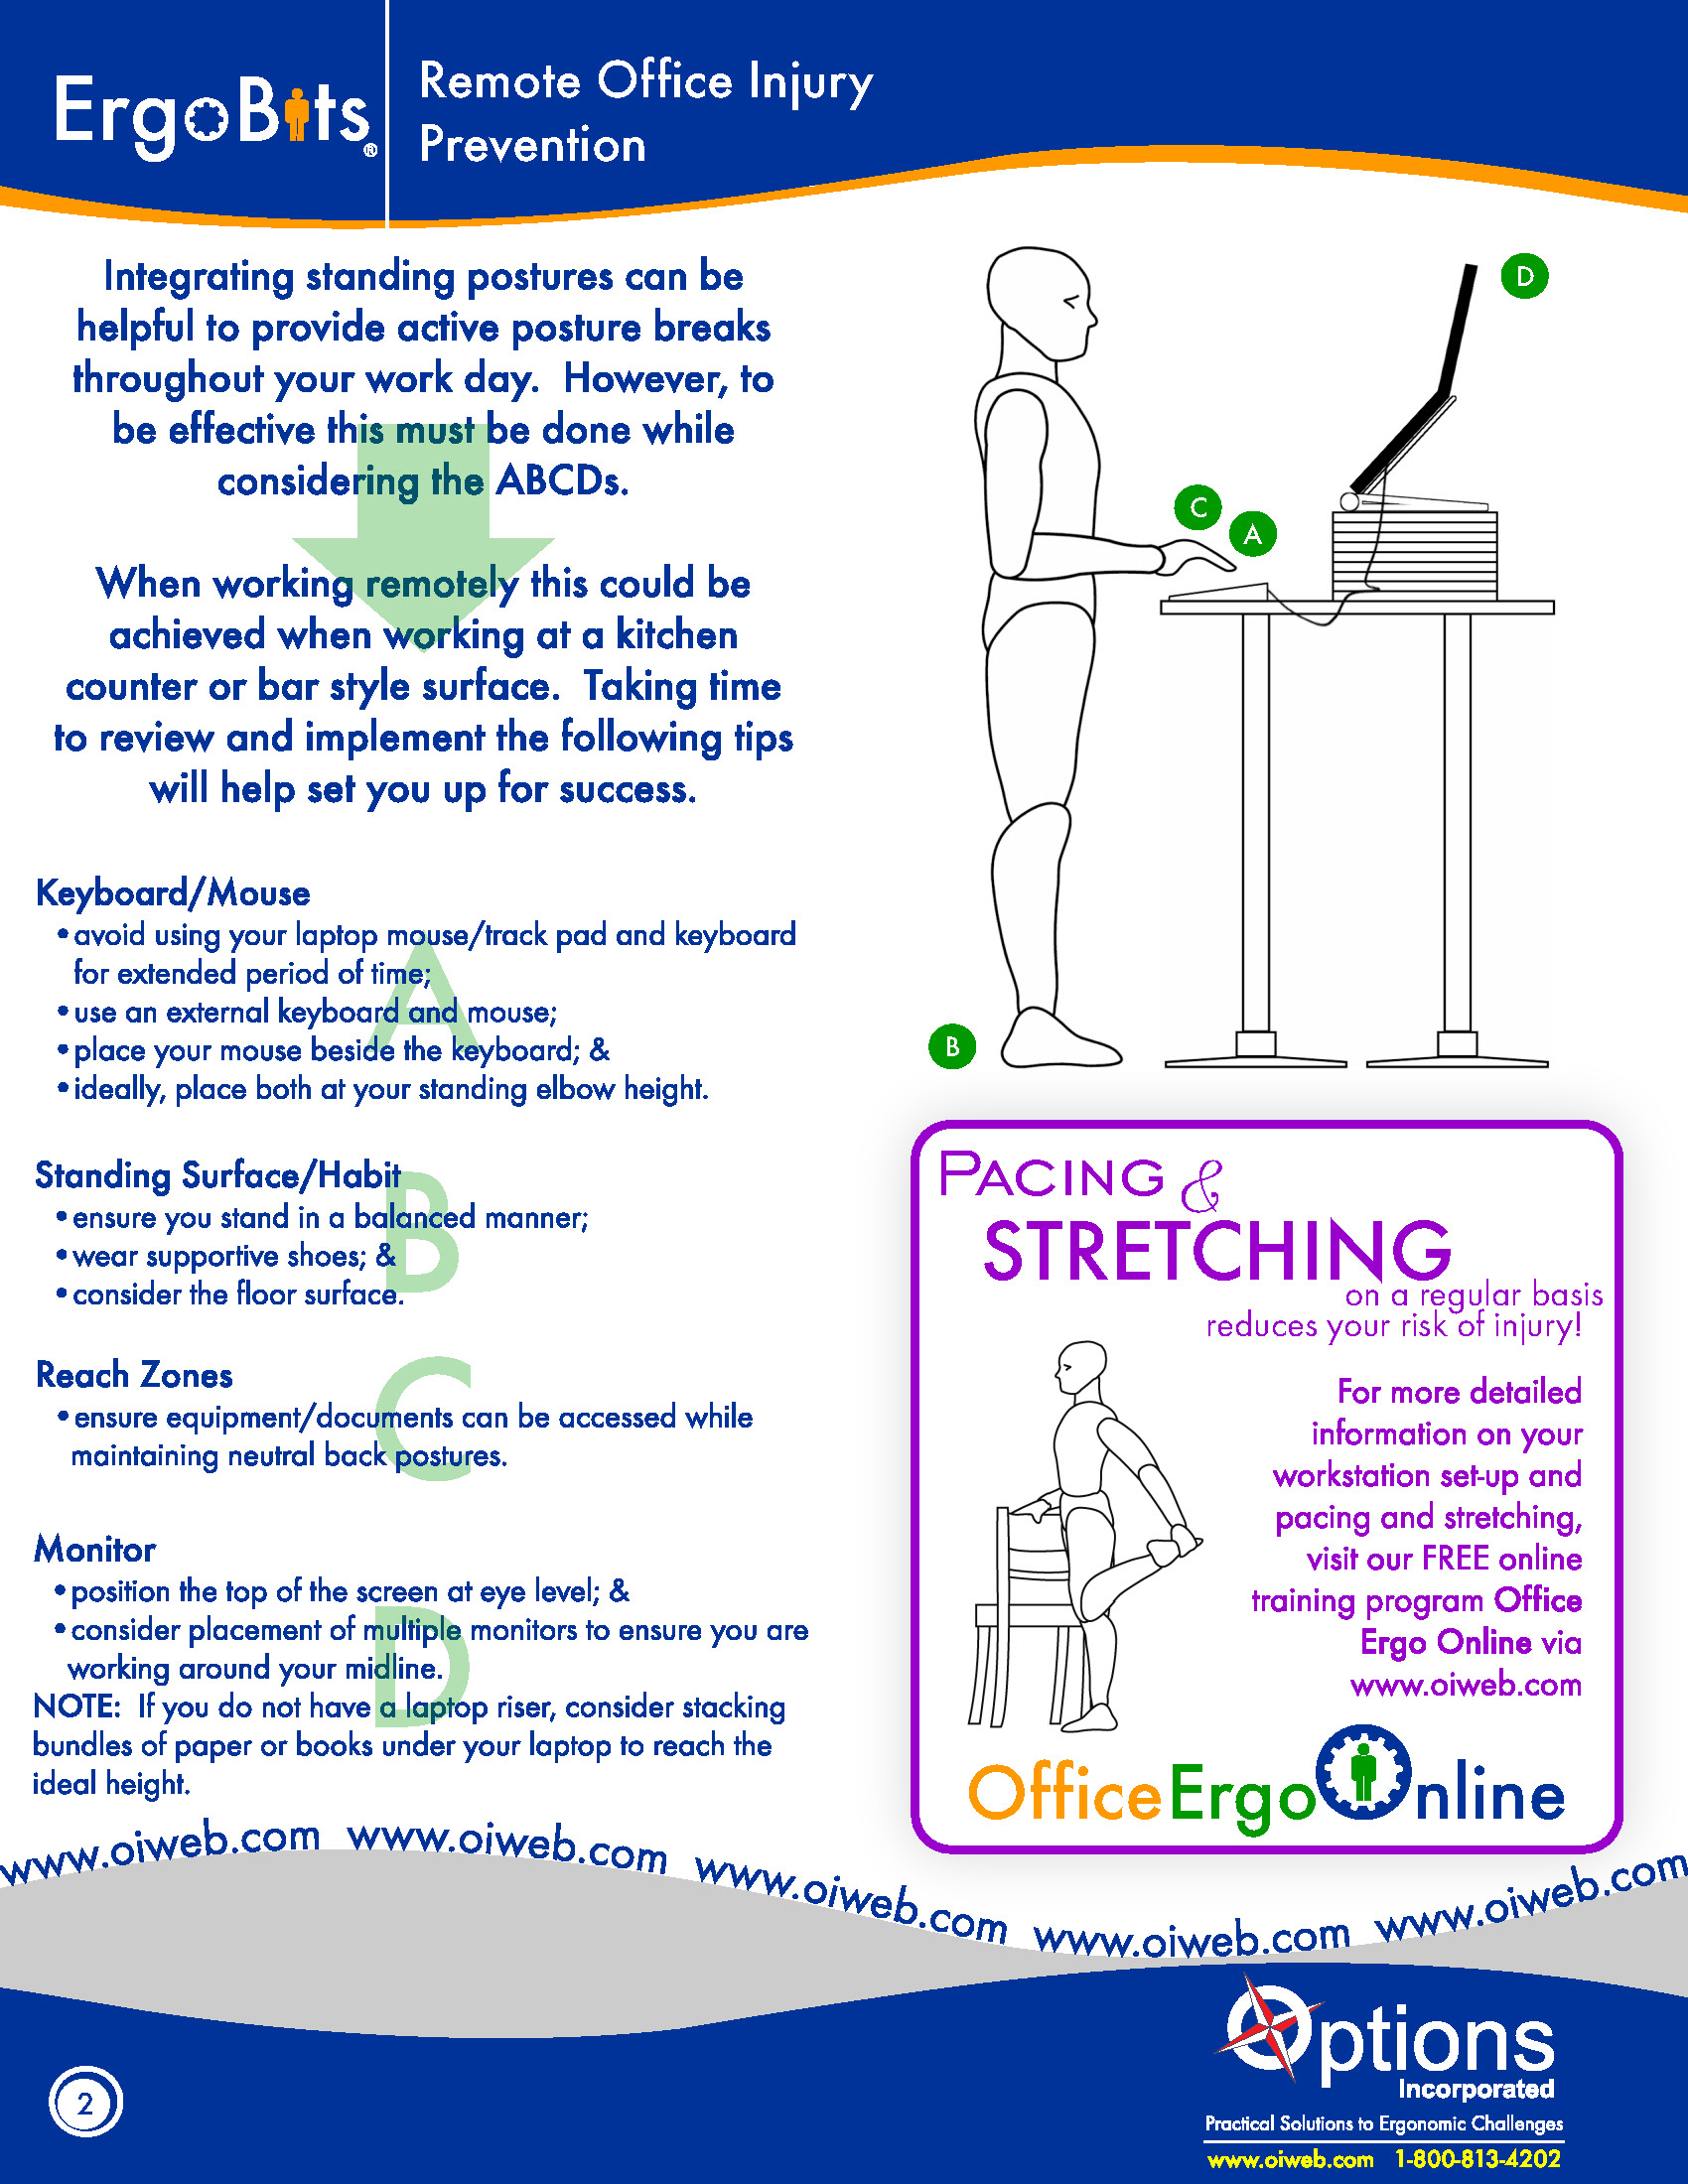
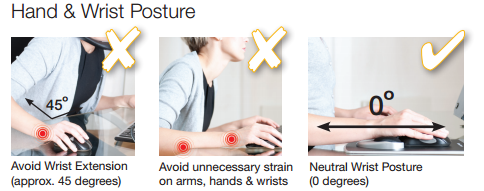
The right angle is also what you’re aiming for with mouse and keyboard adjustment. Your upper arms should rest comfortably at your sides, with your elbows bending at ninety degrees. From there, your forearms rest on the desk, never over-reaching for the mouse or keyboard. If in order to reach your keyboard, you need to move your upper arm away from your side, it’s too far. Bring the keyboard and mouse closer.

hand-wrist-posture

The final right angle to look for is in your torso. When you sit, do your hips stack directly under your shoulders and neck? If you’re slouching or leaning forward, the chair could be to blame. Look for something that supports your low and upper back. That way, you can lean comfortably into your chair while maintaining an upright posture.

Heights

To get started, your chair height should be equal to the length of your calves, allowing your knees to bend at ninety degrees.

The height of your desk should allow your arms to access the mouse and keyboard at a ninety degree angle whether sitting or standing, so what does that look like?

For a sitting desk, look for something with a height around your pelvic region.

sitting-posture

For a standing desk, you’ll want something that tops out around your naval.

sit-stand-setup

Monitor height is a crucial part of our muscular well-being, but so many people get it wrong. The top of your screen should align with your mouth area, and angle upward at about 30 to 40 degrees. This will allow your neck to stay upright, with your chin slightly tucked.

A proper monitor can be especially tricky to visualize, since it’s such a far-cry from how most of us use our computers. For a great visual aid and measurements customized to your body type, check out Computing Comfort.

Home Office Ergonomics


When it comes to working healthy and efficiently, workplace ergonomics doesn’t stop at the office! It should be incorporated into wherever, and however you work…even at home!

To help you work at your best, we’ve partnered with Options Inc. to bring you these ABCD’s of Remote Office Injury Prevention.


Would you like a FREE ergonomic assessment of your remote work setup?

Contact us for details!

Winter Floor Care Tips


With the beauty of white snow covered trees, also comes the slush and grime of melting snow.  Which then of course, gets tracked into your facility.  The endless cycle of ice melt pellets on your floor, followed by the salt stains on your mats and carpets repeats for months until Spring finally arrives.  But it’s not hopeless, there are some things you can do to help your facility look its best during Winter – here are some tips!

Apply a Floor Finish Before the Winter

By mid-fall, you should consider preparing your hard floors for Winter by applying a floor finish.  This will not only add a nice sparkling shine to your floors, it also actually acts as a barrier to protect your floors from the harsh winter elements of ice melt and standing water. 

Implement an Entrance Mat System

An effective entrance matting system can remove as much as 90% of soils from shoes.  A proper entrance matting system consists of:

  1. A scraper mat – placed outside of your entryway to scrape off debris from shoes and begin the removal of any liquids. 
  2. A Scraper/Wiper mat – placed just inside the doorway or inside vestibules.  They clean shoe bottoms and remove any remaining liquid. 

Regular Cleaning

Daily cleaning and maintenance during the Winter to remove tracked in soil from your floors will decrease damage to your floors and reduce the frequency for restorative care, which can be more time-consuming and expensive. Be sure to use a wet/dry vacuum to clean up the debris so it doesn’t continue to be tracked into your facility.  Follow-up by wet mopping hard floors with an ice melt neutralizer solution to remove salt residue and hard water stains, changing the water frequently as you go along.


And there you have it, following these few simple steps will help to keep your facility looking at its best all year round!  If you need any help with product recommendations for your particular application, contact one of our product experts!